Steps to Creating a Weebly Site:
- Browse our Examples page of teacher Weebly sites!
- Sign Up at weebly.com or education.weebly.com (the education version allows teachers to manage student-created websites)
- Choose a Theme - don't stress too much, the theme can be changed at any time
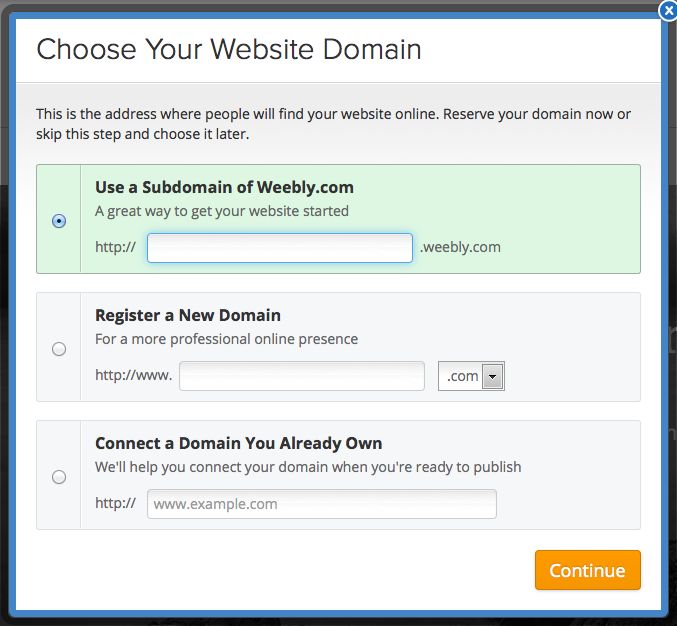
- Select an available Subdomain of Weebly.com
- Watch the video tutorial or click the "Build My Site" button.
- Give your site a title
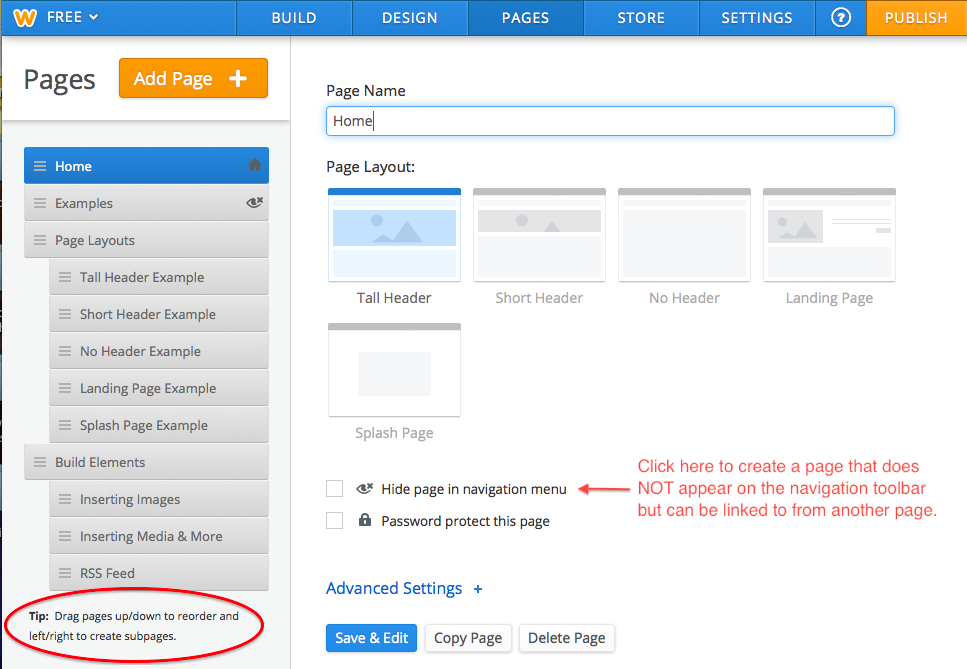
- Use the Pages tab to develop/edit pages
- Click the Publish button frequently as you make changes!
- Edit pages using the drag-and-drop features on the Build tab.
- Share your URL! Put it in your email signature, post it on social networking, and/or link to it from your school's website.
Images Guiding Website Creation:


Other Tips from Weebly Lessons:
In addition to the Home page, the Weebly Lessons navigation toolbar leads to two main pages on this site: Page Layouts and Build Elements. Those pages do contain content AND the drop-down pages contain even more information! Look at the second picture posted above to see how the pages were formatted for drop-down menus.
As you work to build your own website, remember to frequently click the orange PUBLISH button on the top right so your work can be viewed by others. After publishing, a pop-up will appear. You do NOT need to purchase the available Domain Name and you do NOT have to share on Facebook or Twitter (but you sure can!). Simply click the X on the top right corner to clear the pop-up and continue editing!
As you work to build your own website, remember to frequently click the orange PUBLISH button on the top right so your work can be viewed by others. After publishing, a pop-up will appear. You do NOT need to purchase the available Domain Name and you do NOT have to share on Facebook or Twitter (but you sure can!). Simply click the X on the top right corner to clear the pop-up and continue editing!
